How to Open and Run a Flutter Project in Android Studio (2026)
Setting up a Flutter project in Android Studio can feel overwhelming at first. In this guide, we walk through every step — from installing Flutter and Dart plugins to setting the Flutter SDK path, creating an emulator, and running your project with Run.
Related Posts
Table of Contents
- Open Android Studio
- Install Flutter / Dart Plugins
- Set the Flutter SDK Path
- Open the Flutter Project from the Correct Folder
- Set Up and Launch an Emulator (Device Manager)
- Run the Project (Run / flutter run)
- Important Files in a Flutter Project
- Common Errors and Fixes
- VS Code or Android Studio?
- Frequently Asked Questions (FAQ)
- Conclusion
1) Open Android Studio
The first step is simple: launch Android Studio. If this is your first time, Android Studio may prompt you to install or update core components (SDK Manager, etc.) in the background. Let those finish before moving on.
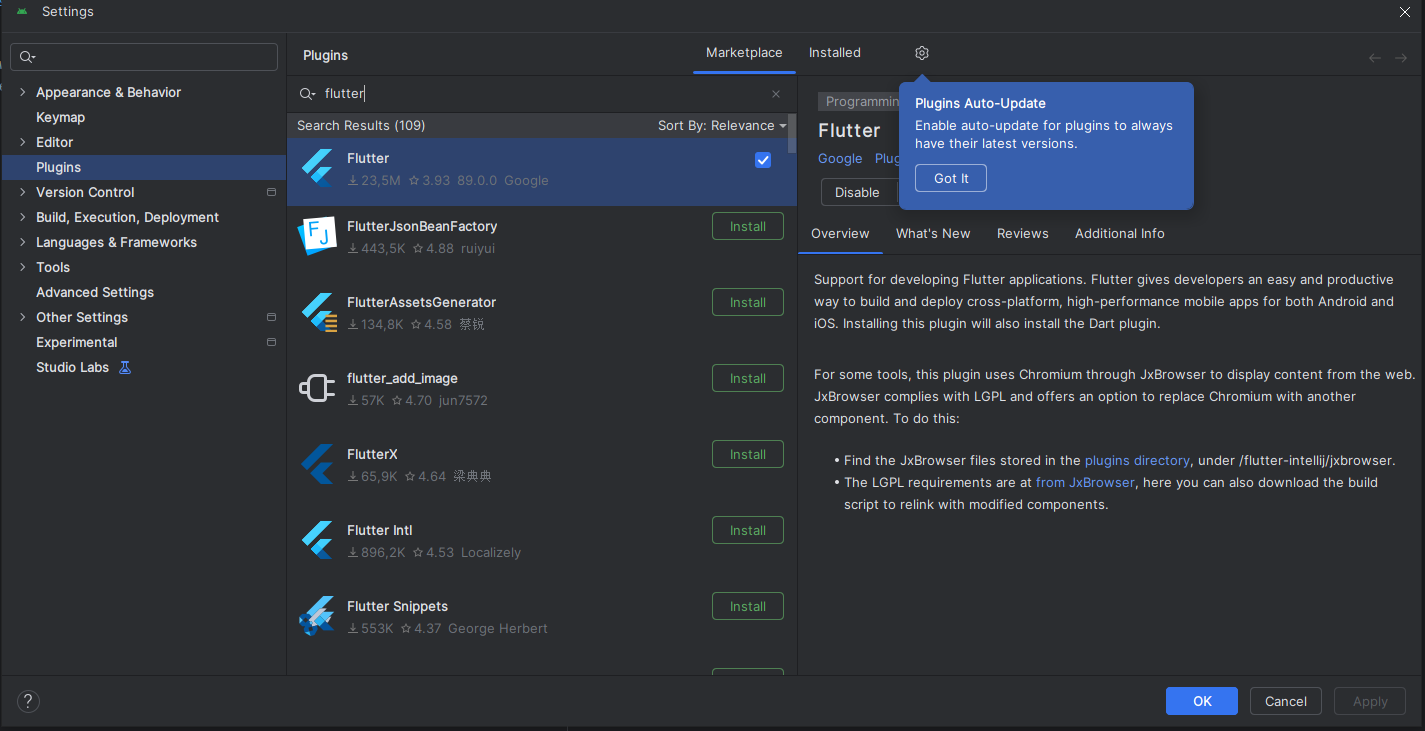
2) Install Flutter / Dart Plugins
To develop Flutter apps in Android Studio, you need both the Flutter and Dart plugins. Installing Flutter usually installs Dart automatically — if not, install it separately.
Path: File → Settings → Plugins
- Search for Flutter in the Marketplace → Install
- If needed, search for Dart and Install it too
- Android Studio will ask to Restart → click Restart

3) Set the Flutter SDK Path (Most Critical Step)
Most "it's not working" problems in Flutter + Android Studio come down to a missing
Flutter SDK path. You need to point Android Studio to the root Flutter folder —
the one that contains the bin directory.
Path: File → Settings → Languages & Frameworks → Flutter
Example path: C:\src\flutter
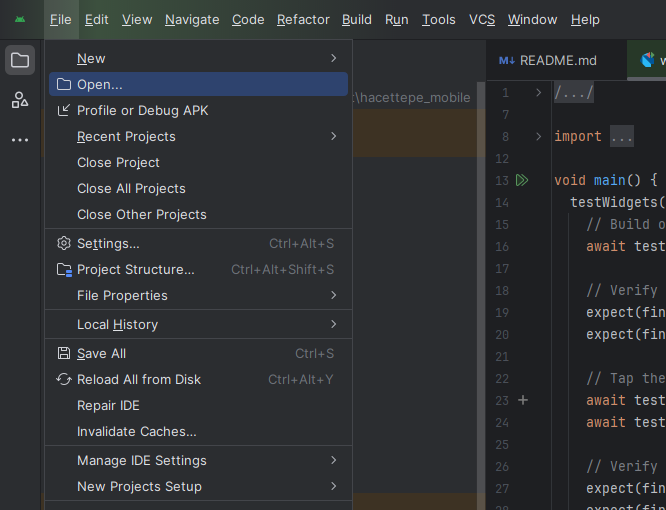
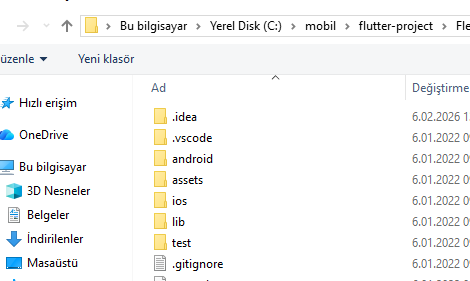
4) Open the Flutter Project from the Correct Folder
The most common mistake when opening a Flutter project in Android Studio is selecting
the android/ subfolder instead of the project root directory.
Always open the root.
- ✅ Correct:
C:\...\my_flutter_app\ - ❌ Wrong:
C:\...\my_flutter_app\android\
Path: Android Studio welcome screen → Open → select the project root folder
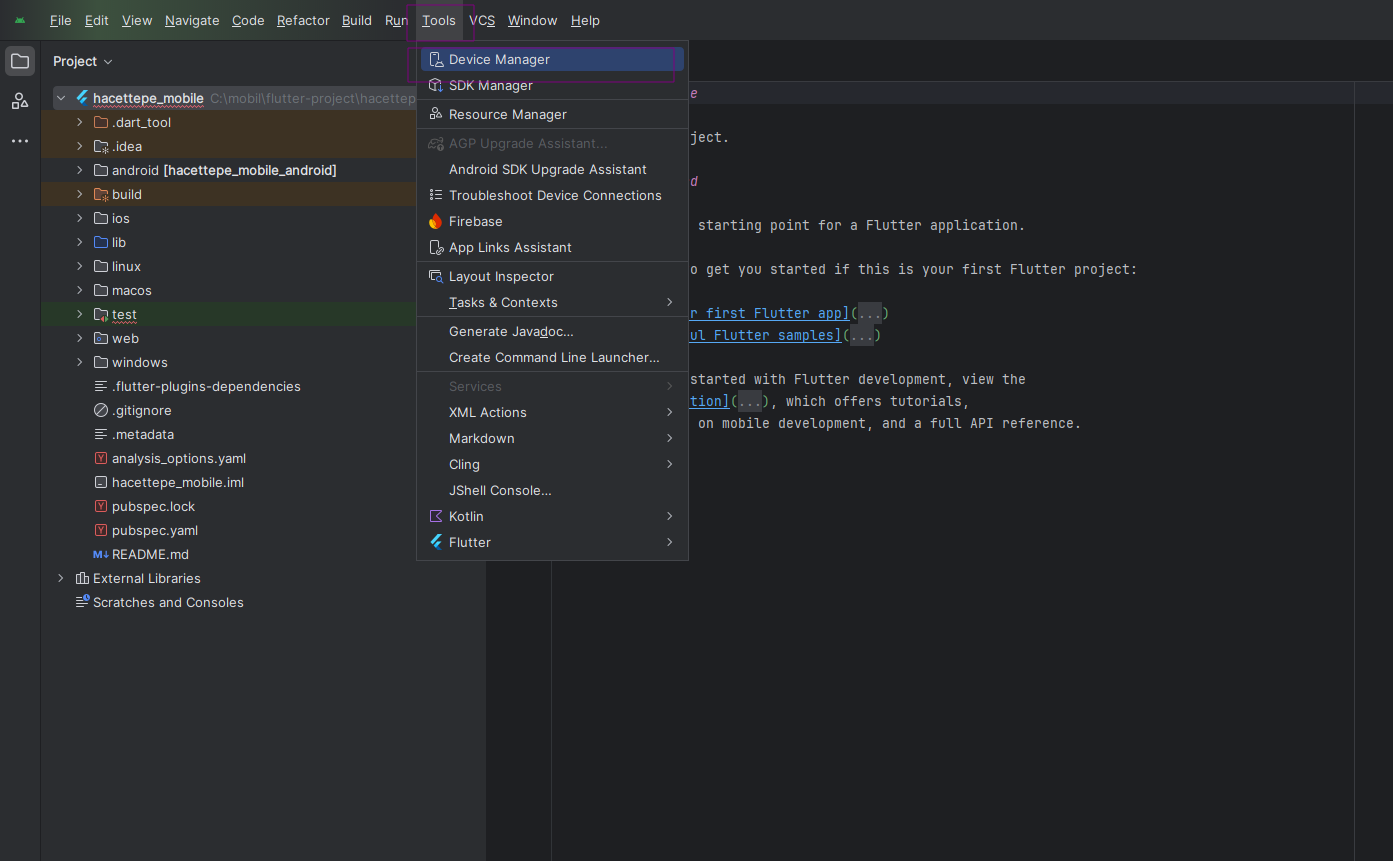
5) Set Up and Launch an Emulator (Device Manager)
To test your Flutter app, you need an Android Emulator. Android Studio's Device Manager lets you create and launch virtual devices.
Path: Tools → Device Manager
- If no device exists: click Create device
- Recommended hardware: Pixel 5 or Pixel 6
- System Image: download API 33 / API 34 (x86_64)
- Once created, press ▶️ Play to start it
6) Run the Project (Run / flutter run)
With the emulator running, you're ready to launch your app. Select your device in the toolbar and click Run.
- Select your emulator from the device dropdown (e.g., Pixel 6 API 34)
- Click the green ▶️ Run button
Alternatively, from the terminal:
flutter pub get
flutter run
7) Important Files in a Flutter Project
- lib/main.dart → entry point of your application
- pubspec.yaml → package dependencies and asset definitions
- Terminal →
flutter pub get,flutter run,flutter clean
pubspec.yaml, run
flutter pub get immediately. New packages won't be available until you do.
8) Common Errors and Fixes
A) "Flutter SDK path not set"
Set the Flutter SDK path via:
File → Settings → Languages & Frameworks → Flutter
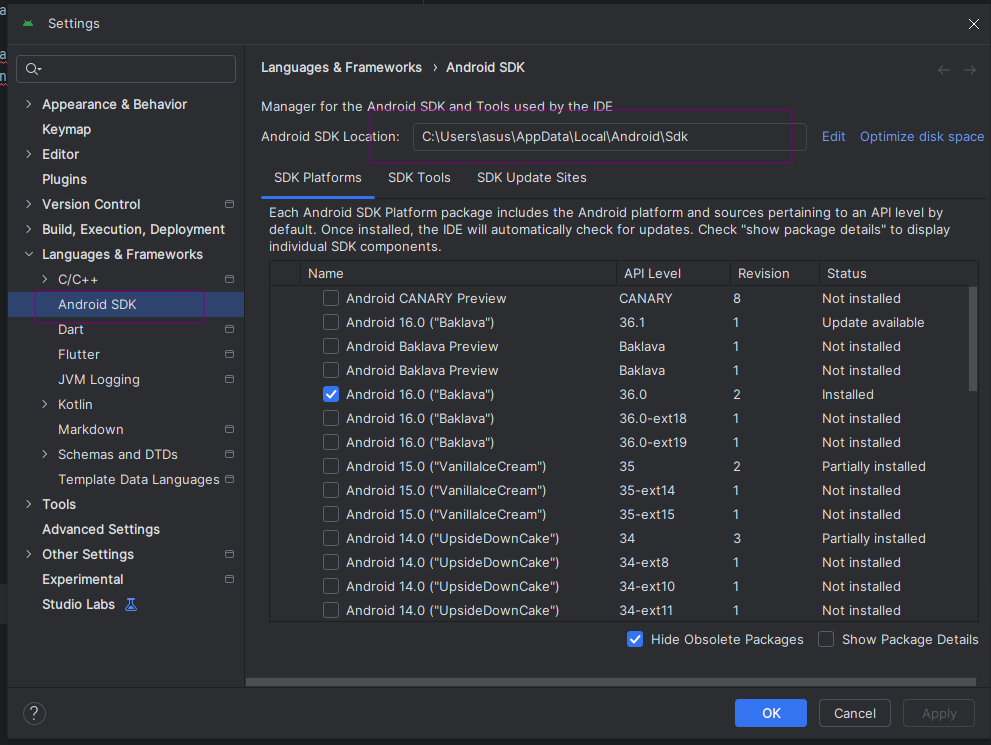
B) flutter doctor — Android Toolchain Showing Red
Make sure Android SDK and Platform Tools are installed via Android Studio's SDK Manager. Then run in terminal:
flutter doctorC) Gradle / Build Errors
These two commands fix most build issues:
flutter clean
flutter pub get
D) Emulator / Device Not Showing Up
With the emulator running, check connected devices with:
flutter devices9) VS Code or Android Studio?
The most productive setup is usually a hybrid: write code in VS Code, manage emulator and debug in Android Studio.
- VS Code: fast, lightweight, great Flutter extensions
- Android Studio: emulator/device manager, logcat, build and release tools
flutter run
10) Frequently Asked Questions (FAQ)
Why am I getting errors when opening a Flutter project in Android Studio?
The most common causes are a missing Flutter SDK path or opening the
android/ subfolder instead of the project root. Check Step 3 and Step 4.
Do I need an emulator, or can I use a real device?
You can absolutely use a real device. Enable USB Debugging on your phone,
connect it via USB, then verify it's detected with flutter devices.
The project opened but dependencies are missing — what should I do?
Run flutter pub get in the terminal. If the problem persists,
run flutter clean first, then flutter pub get again.
How long does Flutter Android Studio setup take?
Plugin installation takes about 5 minutes. Downloading a System Image for the emulator can take 10–30 minutes depending on your internet speed. Budget 30–45 minutes for the full first-time setup.
Conclusion
In this guide, we covered every step needed to open and run a Flutter project in Android Studio. The three most critical points: Flutter and Dart plugins, Flutter SDK path, and opening the project from the root folder. Get those three right and your app will run on the emulator without issues.